> For the complete documentation index, see [llms.txt](https://sharinghub-eng.kittenbot.hk/llms.txt). Markdown versions of documentation pages are available by appending `.md` to page URLs; this page is available as [Markdown](https://sharinghub-eng.kittenbot.hk/functional_module/powerbrick/armourbit.md).
# Armourbit Expansion Box
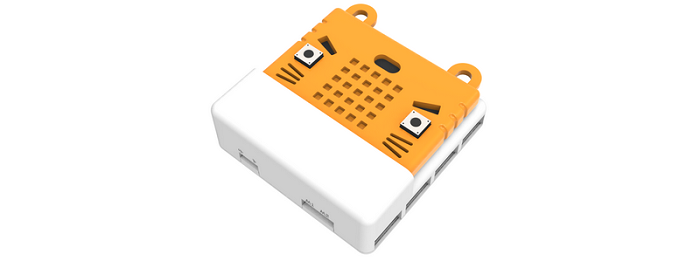
Armourbit Extension Box (HKBD9006A)
Similar to robotbit, Armourbit is an Extension module for Micro:bit, due to its boxy shape, it is called an Extension box.
Armourbit is the main control hub for the Powerbrick system, connecting the Micro:bit with various “bricks”.
It has the following features:
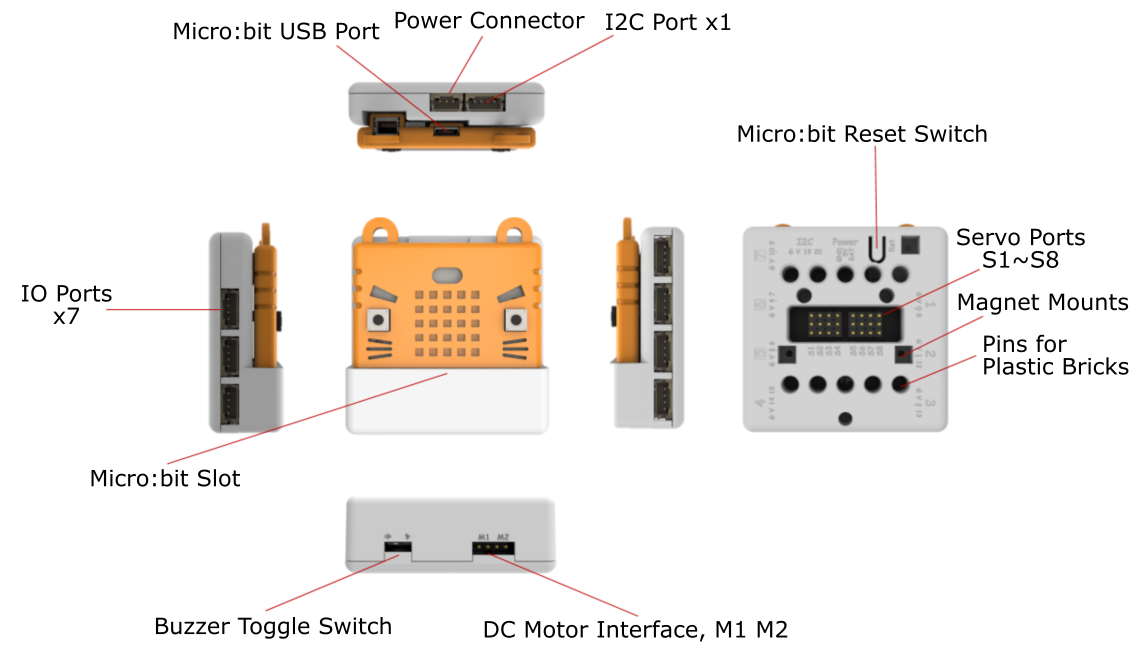
1. 7 IO Ports and 1 I2C port
2. Uses 4Pin PH2.0 ports, ensures correct connection
3. Built-in buzzer and 2 motor ports
4. 8 servo ports
5. Complete encasing of the circuit board, improves safety and makes it more suiable for an education environment.
Developers at Kittenbot hopes to provide a way to expand the usability of Micro:bit while also improving safety, making teaching and learning easier for teachers and students.
### Details
### Specification
* Voltage: 3.3V(No 5V output)
* Dimensions: 61mm X 61mm X 23mm
* Interface: PH2.0 4PIN Ports , follows the GVAB pinout
* DC Motor Driver: Voltage<5V, current<1A, compatible with Kittenbot’s motors
* Servo Drivr: Voltage 3.7\~6V, current<100mA for 1 servo, total current<1A, compatible with Kittenbot’s servos
Microsoft MakeCode Programming Platform:
Makecode Online:
**Powerbrick Extension**:
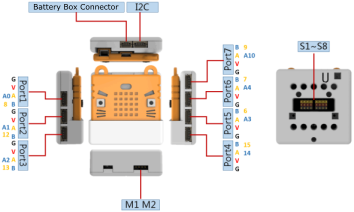
### Pin Distribution
* It is not necessary for new users to remember the corresponding pins for each port, it is sufficient to remember the 7 ports.
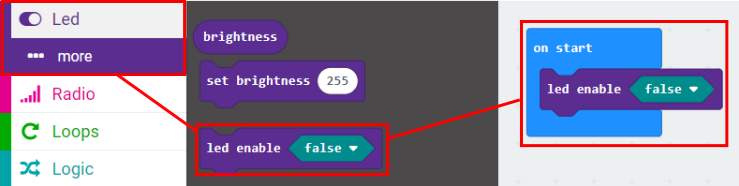
* Using **Port5-Port7** requires turning off the LED Matrix of the Micro:bit since these Ports are used by Micro:bit’s LED Matrix(Refer to the following figure).
* Analog modules cannot use Port 4 (Moisture and Water Sensor can’t be used)
### Precautions
* The Servo Interface is intended to use with 9g servos or Geekservo servos, high current servos should not be used.
* The DC motor Interface is intended to use with Kittenbot’s TT motors or Geekservo motors, hight current motors should not be used.
* The built-in buzzer uses Pin 0 of the Micro:bit, please make sure the toggle switch is at the correct position when Pin 0(Port 1) is being used. (Buzzer is set to **ON** by default)
* The PowerBrick Battery Box must be connected when modules, servos or motors are being used or they may exhibit erratic behaviour.
### Installing Micro:bit onto Armourbit
1. Slot in the Micro:bit with the A and B buttons facing outwards.
2. Checking the buzzer toggle switch.
### Resetting the Micro:bit’s program
1. Power on the Micro:bit.
2. Press the button on the back of the Armourbit to reset the Micro:bit.
### MakeCode Coding Tutorial
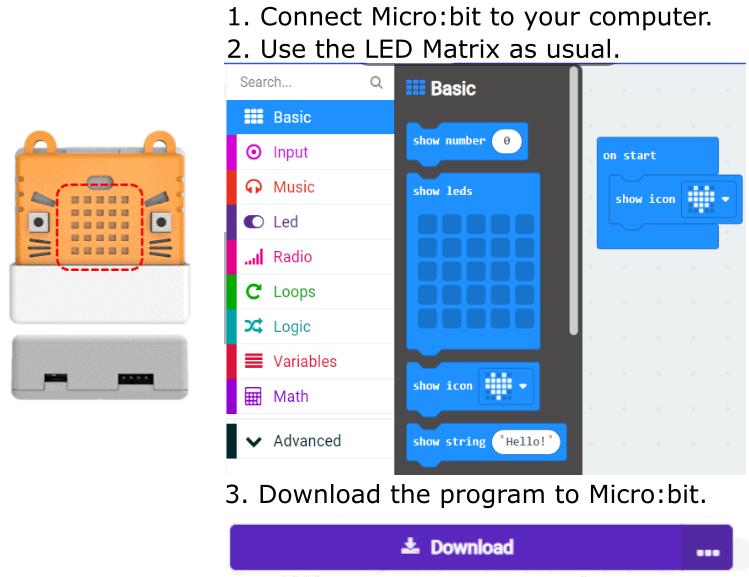
#### Using the LED Matrix
Same with Micro:bit.
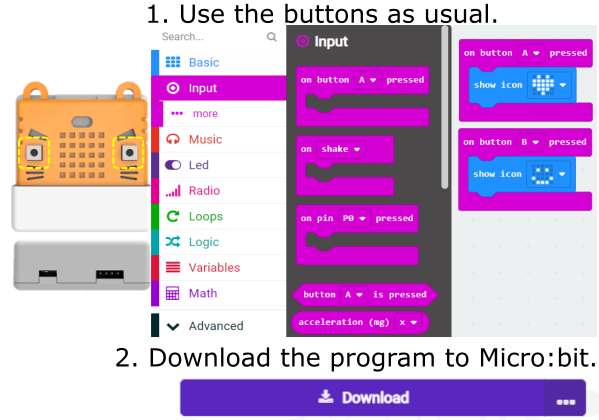
#### Using the Buttons
Same with Micro:bit.
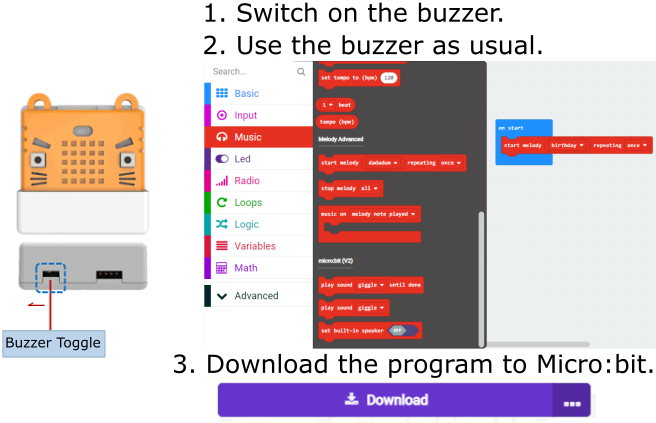
#### **Using the Buzzer**
Same with Micro:bit.
### Extension Version and Updates
There may be updates to extensions periodically, please refer to the following link to update/downgrade your extension.
[Makecode Extension Update](https://kittenbothk-eng.readthedocs.io/en/latest/Makecode/makecode_extensionUpdate.html)