> For the complete documentation index, see [llms.txt](https://sharinghub-eng.kittenbot.hk/llms.txt). Markdown versions of documentation pages are available by appending `.md` to page URLs; this page is available as [Markdown](https://sharinghub-eng.kittenbot.hk/extension-boards/joyfrog/info.md).
# JoyFrog micro:bit Controller Info
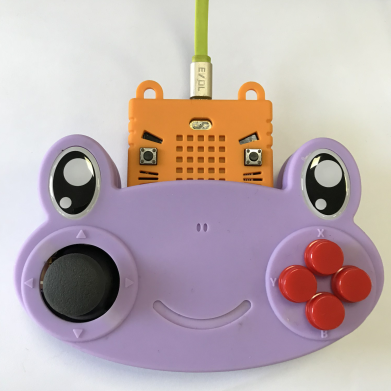
Kittenbot JoyFrog micro:bit遙控綠色(HKBA8027A)
Kittenbot JoyFrog micro:bit遙控紫色(HKBA8027B)
JoyFrog is a Micro:bit expansion board by Kittenbot, it is designed to add input devices including an analog joystick and 4 buttons, making it ideal in acting as a remote control for robots.
It can also be programmed using Kittenblock to act as a micro controller.
### Package Contents
* Joyfrog Controller x1
* Microbit Battery Box x1
### Special Features
* Controller Mode: Can be used as a game controller in KittenBlock or Scratch.
* Expansion Board Mode: Can be used as an expansion board for Micro:bit, provide game-like controls for Micro:bit.
* 3 pin and 4 pin PH2.0 connectors allows JoyFrogs to use Kittenbot modules.
* Game Controller: Can be used as a normal game controller in computer games.
### Specifications
* Dimensions: 128mm x 80mm x 35mm
* Main Chip: GD32F350C8T6
* Clock Speed: 108MHz
* Flash Memory: 64K
* RAM: 8K
* Voltage: 3.3V
* Power Input: Micro USB(5v)/3v(AAA x2, JST Connector)
### On-board devices
* 2 Axis Analog Joystick with button
* 4 Buttons
* InfraRed Trasmitter and Receiver (Able to decode NEC codes)
* Edge Connector with 8 IO Pins
* Buzzer
* Buzzer Toggle Switch (Switch between buzzer or headphones)
### IO Ports
* Microbit 40PIN Slot x1
* GVAB 4PIN PH2.0 Connectors x2
* GVS 3PIN PH2.0 Connectors x2
* 3.5 Audio Jack x1
* NRF24L01 8PIN 2.4G Wirelessx1
### Supported Software
* Kittenblock
* MakeCode
### Breakdown Diagram
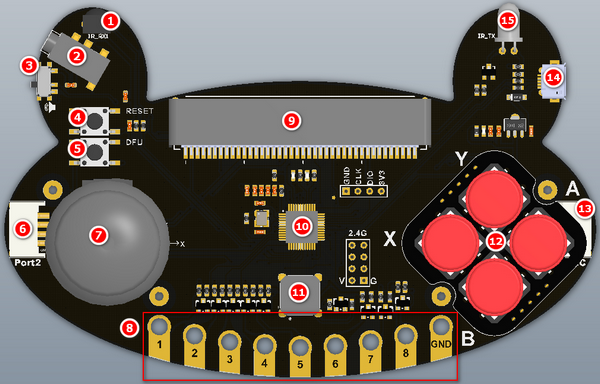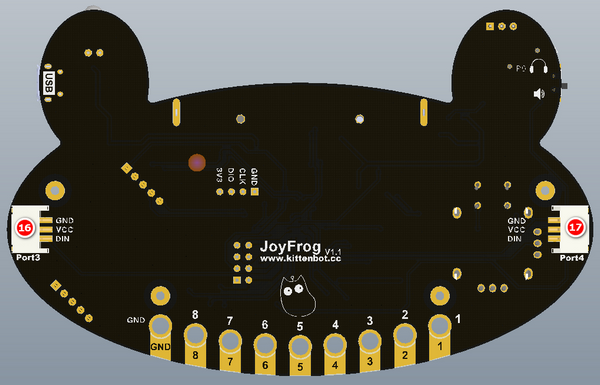
1. InfraRed Receiver
2. 3.5mm Audio Jack
3. Buzzer Toggle Switch
4. Reset Button
5. DFU Mode Button
6. 4Pin connector
7. Joystick
8. IO Pins Contacts (1\~8, GND)
9. Microbit 40PIN Slot
10. Main Chip
11. Buzzer
12. 4 Buttons
13. 4Pin I2C connector
14. MicroUSB Port
15. InfraRed Transmitter
16. 3Pin connector
17. 3Pin connector
#### Demo Video
{% embed url="" %}
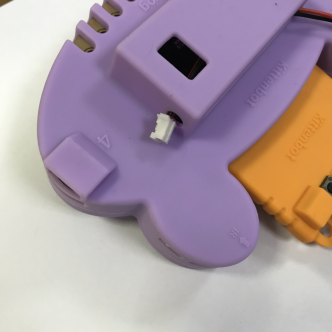
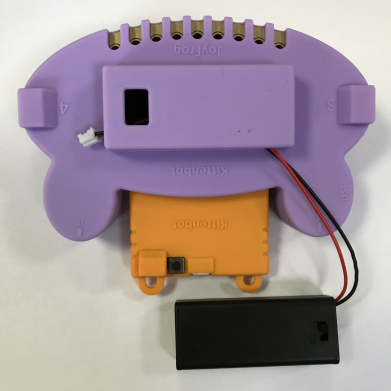
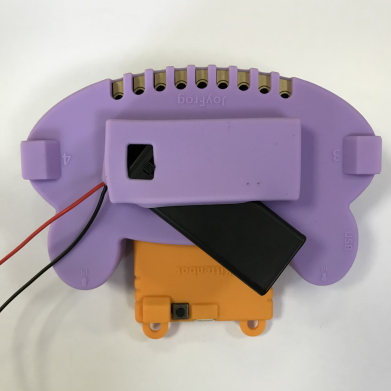
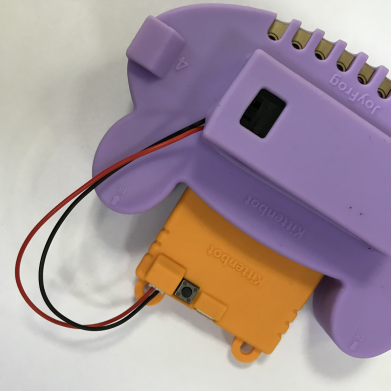
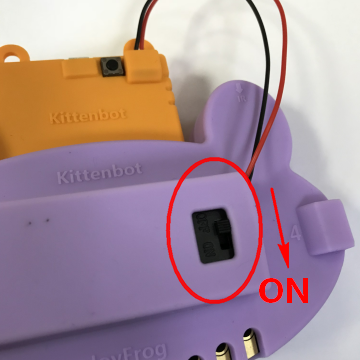
### Installing a Battery Box
By installing a Micro:bit Battery Box, there is no need to connect a USB power at all times\~
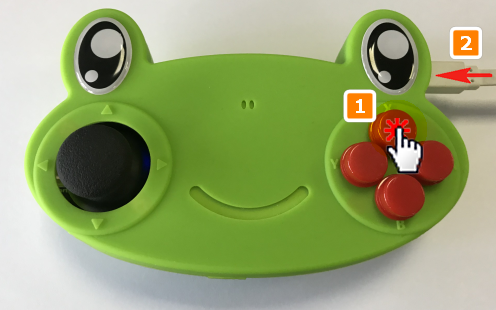
### JoyFrog 2 Player Mode
Considering students may create multiplayer games with KittenBlock or Scratch, JoyFrog has a 2 player mode which allows users to use 2 JoyFrogs with the same computer.
Press and hold X and connect JoyFrog to a computer, there will be 2 long beeps, this means the JoyFrog is in player 2 mode.
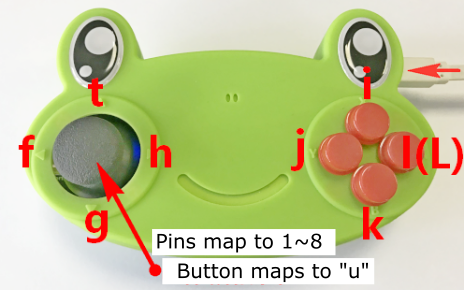
Key mappings for player 2 mode: