> For the complete documentation index, see [llms.txt](https://sharinghub-eng.kittenbot.hk/llms.txt). Markdown versions of documentation pages are available by appending `.md` to page URLs; this page is available as [Markdown](https://sharinghub-eng.kittenbot.hk/airelated/ai-camera-koi-2/kittenblock-programming/koi-2-in-kittenblock-quick-start-guide.md).
# KOI 2 in KittenBlock Quick Start Guide
## **Wiring**
### **1. Use with Robotbit EDU**
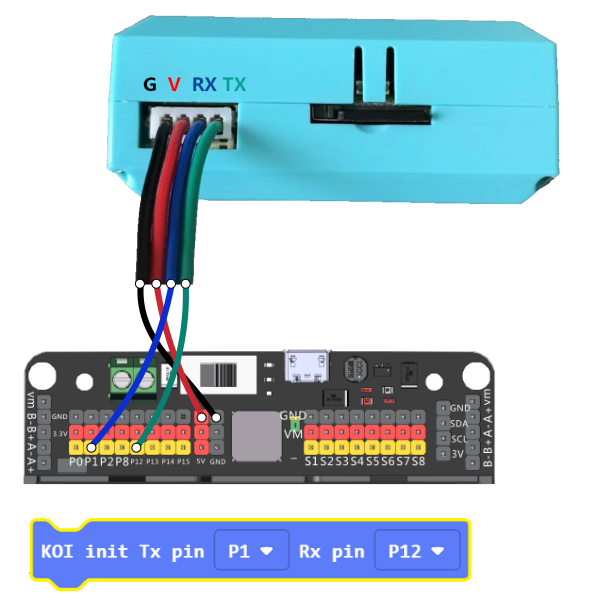
Use the cable included to connect KOI to Robotbit.
Connect KOI 2 to the serial port of the Robotbit EDU as shown in the illustration.
As Robotbit EDU uses P2 and P12 for its serial port, you will need to select the appropiate pins in the MakeCode program.
{% hint style="info" %}
If you wish to power the KOI using USB power, please remove the black(GND) and red(5V) wires.
{% endhint %}
{% hint style="info" %}
KOI 2 RX Port(Yellow) Connects to Robotbit TX Port(P2)
KOI 2 TX Port(Blue) Connects to Robotbit RX Port(P12)
{% endhint %}
### **2. Use with Robotbit 2.2**
Use the cable included to connect KOI to Robotbit.
Refers to the following illustration for correct wiring.
Black - GND
Red - 5V
Yellow - P2 (TX)
Blue - P12 (RX)
```
The (Blue)TX wire must be connected to an analog pin(Pin0-Pin2).
Remember to remove the buzzer jumper when Pin0 is used.
```
**Do not connect Red to Ground and Black to 5V!!!**
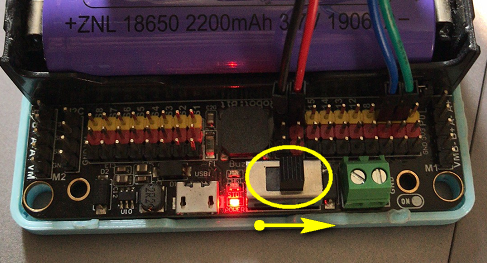
Ensure the connection is correct and switch the power on.
### Quick Start on KittenBlock
Open KittenBlock in browser.
{% embed url="" %}
Select FutureBoard Hardware. (Futureboard or Futureboard Lite)
Turn on REPL mode on the Futureboard by connecting it on KittenCode.
Open Coding Mode to Uploadthe program onto your Futureboard.