> For the complete documentation index, see [llms.txt](https://sharinghub-eng.kittenbot.hk/llms.txt). Markdown versions of documentation pages are available by appending `.md` to page URLs; this page is available as [Markdown](https://sharinghub-eng.kittenbot.hk/airelated/koi/koimc/line-tracing.md).
# Line Tracing
ine Tracing is usually used in line tracing robots, we will learn how to obtain the coordinates of the line (x1,y1) & (x2,y2 )in this tutorial.
### Getting coordinates
#### **Loading Extensions**
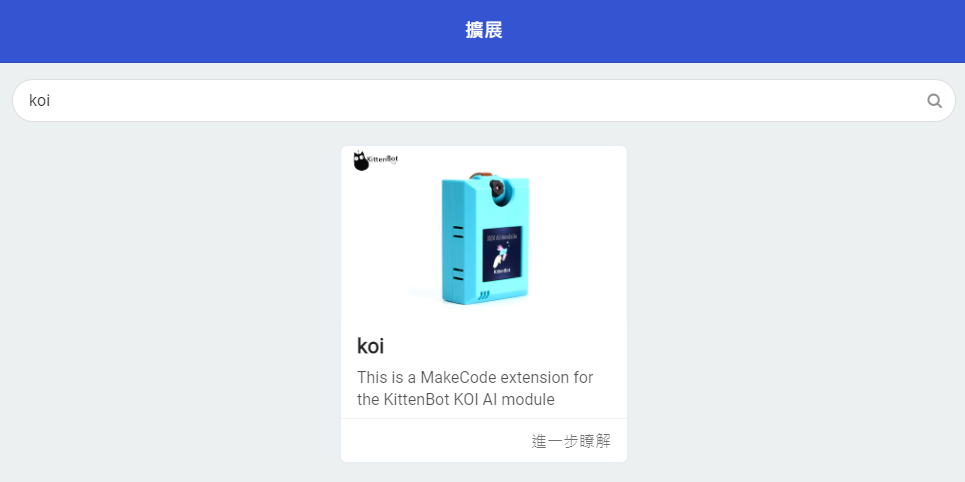
Search "KOI" in the search bar.
Or copy and paste the following link to the search bar.
****
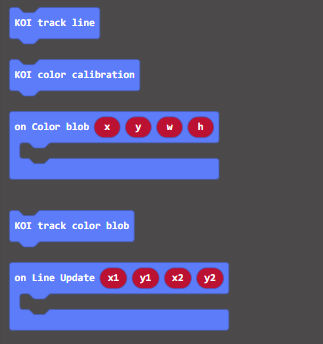
Blocks for Line Tracing:
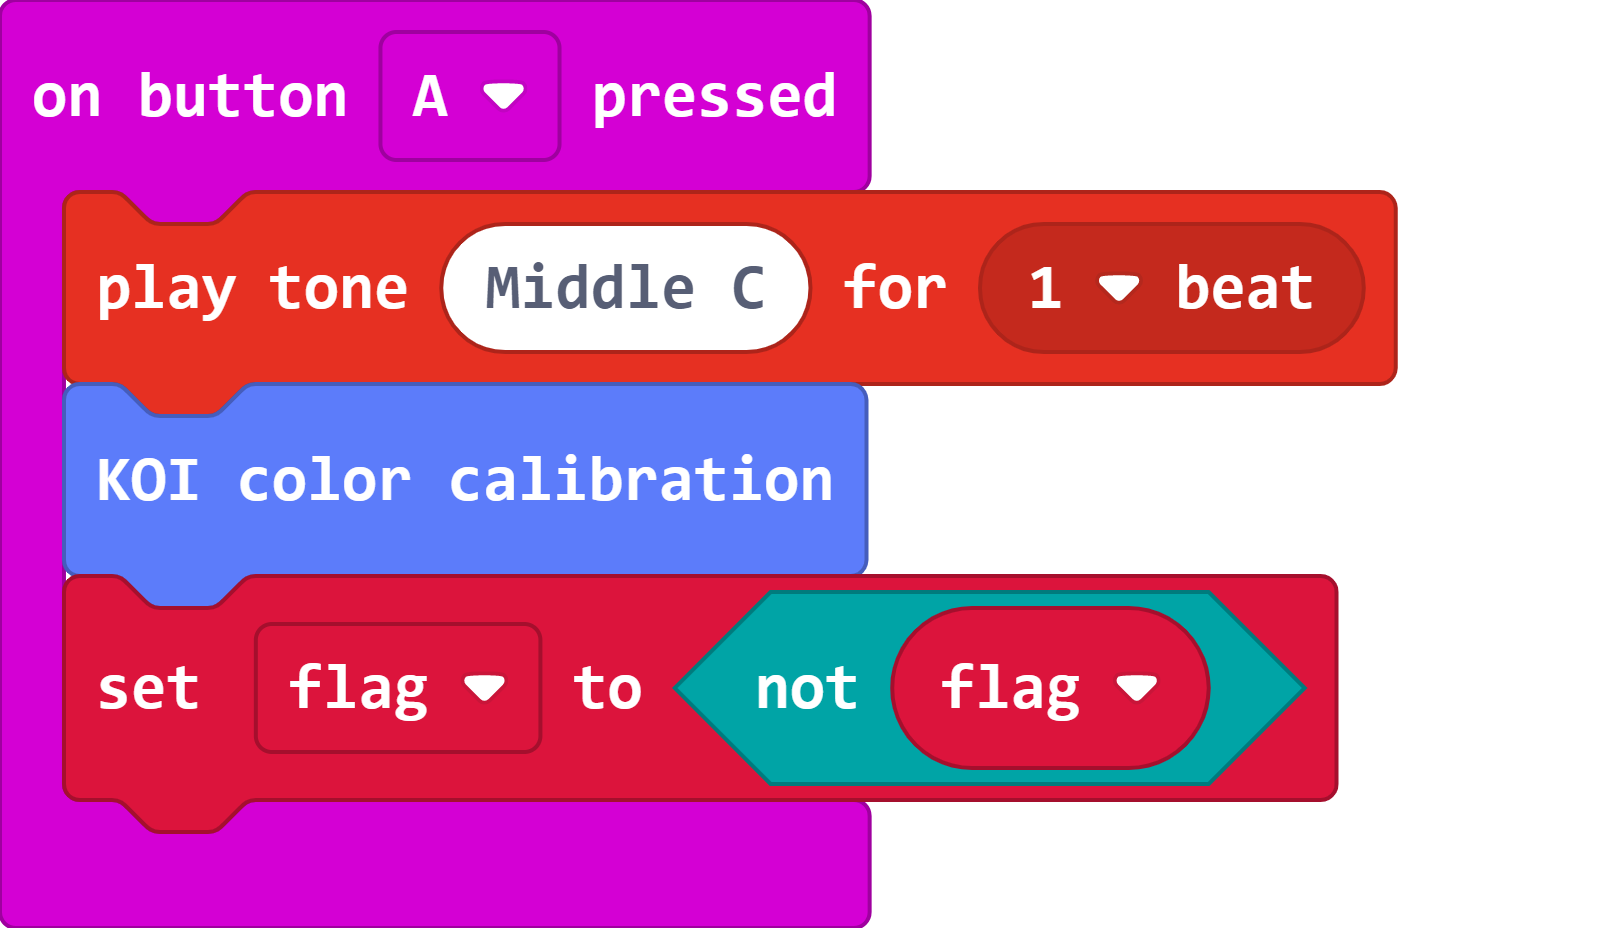
#### Sample Program
{% embed url="" %}
### Color Calibration
Line Tracing and Blob Tracing both require calibration before using.
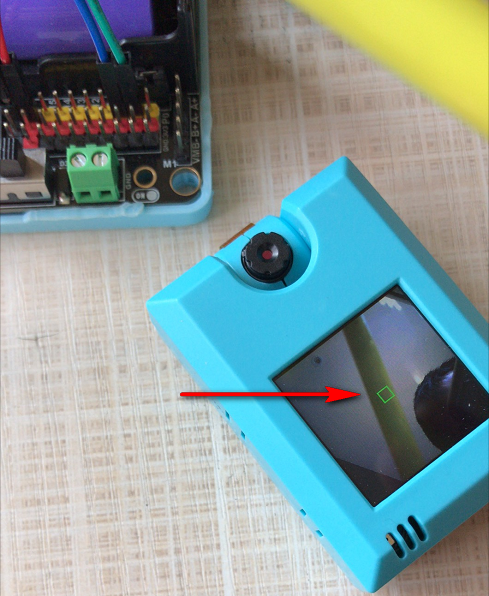
During calibration, a small green square will appear on the screen. Aim the square at the color you intend to track. The calibration will be done automatically.
It is recommended to have a distinct difference between the color you intend to track and the background.
### Program Flow
Download the program to the Micro:bit.
Put a thin object in front of the camera and press A to calibrate color.
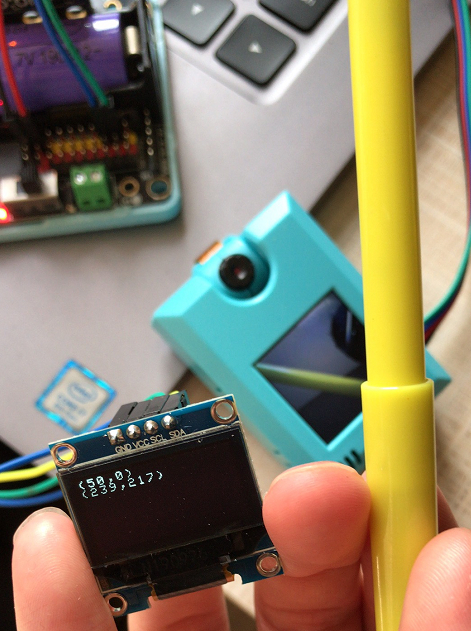
After calibration, the coordinates of the line will be shown on the screen.
### Advanced Program
The information becomes more easily readable if we add an OLED screen.
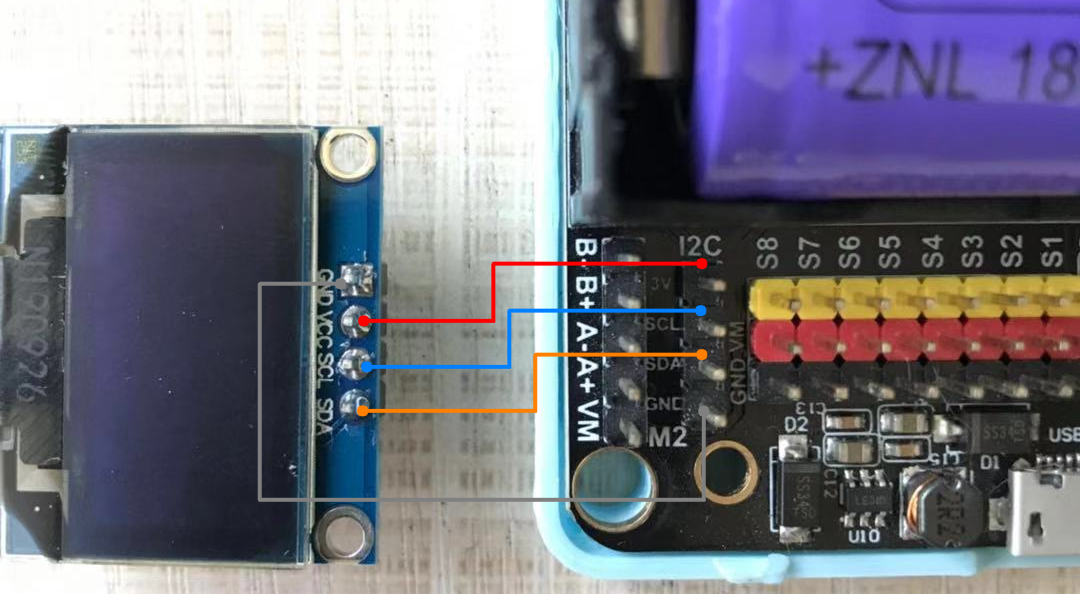
#### Connecting an OLED
Connect an OLED panel to the I2C port of your Robotbit/Armourbit.
#### Sample Program
{% embed url="" %}
The program works the same way as the normal program, but now the coordinates are displayed on the oled.
### Sample Codes
[1. Line Tracing (Extension0.5.7)](https://makecode.microbit.org/_DriAw4Hi5YDe)
[2. Line Tracing /w OLED (Extension0.5.7)](https://makecode.microbit.org/_KJXToKVxW8do)
### Extension Version and Updates
There may be updates to extensions periodically, please refer to the following link to update/downgrade your extension.
[Makecode Extension Update](https://kittenbothk-eng.readthedocs.io/en/latest/Makecode/makecode_extensionUpdate.html)
### FAQ
#### 1: There is no reaction after pressing the buttons on the Micro:bit.
· A: This is because KOI has a longer boot time than Micro:bit. When the power is turned on, Micro:bit has already ran the code for KOI initialization before KOI is ready.
· Solution: Reset your Micro:bit after KOI has been turned on. (The trick is to let KOI power on completely before initialization.)
#### 2: Does KOI work with 3V input?
· A: No, KOI only works with 5V.
#### 3: How to improve line tracing accuracy?
· A: Keep a clean background and use a color that is significantly different from the background.